5 Cool DIY Tech Projects You Can Try at Home

Are you interested in combining your love for technology with a bit of hands-on creativity? DIY tech projects are a fantastic way to learn new skills, explore innovative ideas, and have fun with technology.
Whether you’re a beginner or an experienced tech enthusiast, there’s something for everyone. Here are five cool DIY tech projects you can try at home:

1. Create Home Automation System
Creating a home automation system can significantly enhance the comfort, security, and efficiency of your home. The process involves several detailed steps to ensure that all components work harmoniously together, providing a seamless user experience.
Plan Your System
The first step is to plan your system thoroughly. Decide which aspects of your home you want to automate, such as lighting, temperature control, security systems, and various appliances.
Identify specific devices you want to integrate, like smart bulbs, thermostats, smart locks, security cameras, and smart plugs. Draft a comprehensive plan detailing where each device will be installed, how they will communicate, and how you will control them.
This planning phase is crucial as it sets the foundation for a cohesive and functional automation system.
Choose Your Platform
Selecting the right home automation platform is essential for integrating and managing your devices. Platforms like SmartThings, Google Home, and Amazon Alexa each offer different features and compatibility with various devices.
Evaluate the platforms based on their ability to support the devices you’ve chosen, and ensure they offer features such as remote control, scheduling capabilities, and the ability to create custom automation rules and scenes. The right platform will streamline the control and customization of your automation system.
Gather Components
Once you’ve planned and selected a platform, gather all necessary components. You’ll need a central hub or controller that acts as the brain of your automation system, connecting and managing all your smart devices. Ensure that this hub is compatible with your chosen platform.
Collect smart devices like smart bulbs, thermostats, locks, cameras, and plugs. Verify that these devices are compatible with your hub and platform. Additionally, consider adding sensors for motion, temperature, or humidity to further enhance your system’s capabilities. Ensure you have a stable and reliable Wi-Fi network to support the connectivity of all your devices.
Install and Set Up Devices
Proceed with the installation and setup of your devices. Start by installing each smart device according to the manufacturer’s instructions. This typically involves using a mobile app to connect the device to your Wi-Fi network and integrate it with your central hub or controller.
Set up your hub or controller by following the manufacturer’s guidelines to connect it to your network and ensure it communicates effectively with your devices. Add each device to your chosen automation platform, following the app or web interface instructions. Confirm that all devices are recognized and can be controlled via the platform.
Configure Automations and Scenes
After installation, configure your system to suit your needs. Create automation rules that define how devices should interact based on specific conditions. For example, set up rules to turn on lights when motion is detected or adjust the thermostat when you leave or return home.
Additionally, establish scenes that allow multiple devices to be controlled with a single command, such as a “Goodnight” scene that turns off lights and locks doors. Fine-tune these settings to match your daily routines and preferences.
Test Your System
Thoroughly test your system to ensure everything functions correctly. Verify that each device and automation rule works as expected. Make adjustments as necessary to resolve any issues or improve performance.
Test remote access to confirm you can control your devices through the platform’s app or web interface from anywhere, ensuring that all functionalities are accessible and reliable.
Maintain and Update
Ongoing maintenance and updates are vital for the smooth operation of your home automation system. Regularly update the firmware of your devices and hub to ensure compatibility with new devices and to receive the latest security patches. Continuously monitor the performance of your system, addressing any issues promptly and making adjustments as needed.
Keeping your system up-to-date will ensure that it remains effective and secure over time.
By carefully planning, setting up, and maintaining your home automation system, you can create a smart home environment that enhances your lifestyle with improved comfort, security, and efficiency.

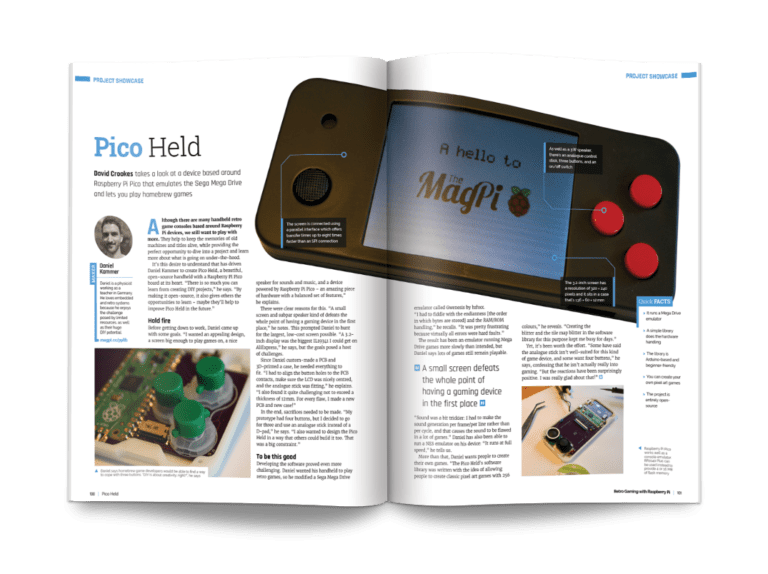
2. Build a Retro Gaming Console
Building a retro gaming console is a rewarding project that allows you to relive classic games on modern hardware. Here’s a detailed guide to help you through the process:
Gather Components
Start by collecting all the necessary hardware. You’ll need a Raspberry Pi, which will serve as the core of your retro gaming console. Choose a microSD card with at least 16GB of storage to hold the operating system and your games. A reliable power supply is essential to keep the Raspberry Pi running smoothly. Protect your Raspberry Pi and aid with cooling by using a case. Additionally, obtain a USB or Bluetooth controller compatible with RetroPie. Use an HDMI cable to connect your Raspberry Pi to your TV or monitor. Consider optional components like a cooling fan, heatsinks, and peripherals such as a keyboard or mouse for easier management and setup.
Install RetroPie
RetroPie is the software that transforms your Raspberry Pi into a retro gaming console. Begin by downloading the RetroPie image from the official RetroPie website, ensuring you select the version compatible with your Raspberry Pi model. Use a tool like Balena Etcher to flash this image onto your microSD card. This process prepares the card for use with RetroPie. Insert the microSD card into your Raspberry Pi, connect it to your monitor using the HDMI cable, and ensure all other components are properly connected.
Setup and Configuration
Once RetroPie is installed, you need to configure it. Power on your Raspberry Pi, and RetroPie will boot up, prompting you to configure your controller. Follow the on-screen instructions to set up your controller properly. Connect your Raspberry Pi to your Wi-Fi network through the RetroPie setup menu to enable network features and updates. Make sure all software is up-to-date by running the update scripts available in the setup menu. This step ensures that your system runs smoothly and has the latest features and bug fixes.
Add Games
To add games to your retro console, obtain ROMs legally. You can download ROMs from reputable sources or use a USB drive to transfer files directly to your Raspberry Pi. Place the ROM files into the appropriate game directories within the /home/pi/RetroPie/roms folder. This organization allows RetroPie to recognize and categorize your games, making them accessible from the gaming interface.
Customize Your Console
Personalize your retro gaming console by changing its appearance and functionality. Explore the RetroPie configuration menu to apply different themes and skins to modify the interface’s look. Install additional emulators if you want to play games from a wider range of consoles. Configure save states and other features to enhance your gaming experience, adjusting settings to suit your preferences. Customizing your console helps create a unique and enjoyable gaming environment tailored to your tastes.
Enjoy Your Retro Console
With everything set up and customized, navigate through the RetroPie interface to start playing your classic games. Regularly update your software to benefit from new features and improvements. Manage your game library effectively to keep your collection organized and ensure that your console remains an enjoyable and reliable source of retro gaming fun.
Building a retro gaming console provides a nostalgic experience while leveraging modern technology. By following these steps, you can create a personalized gaming system that brings classic games to life with ease.

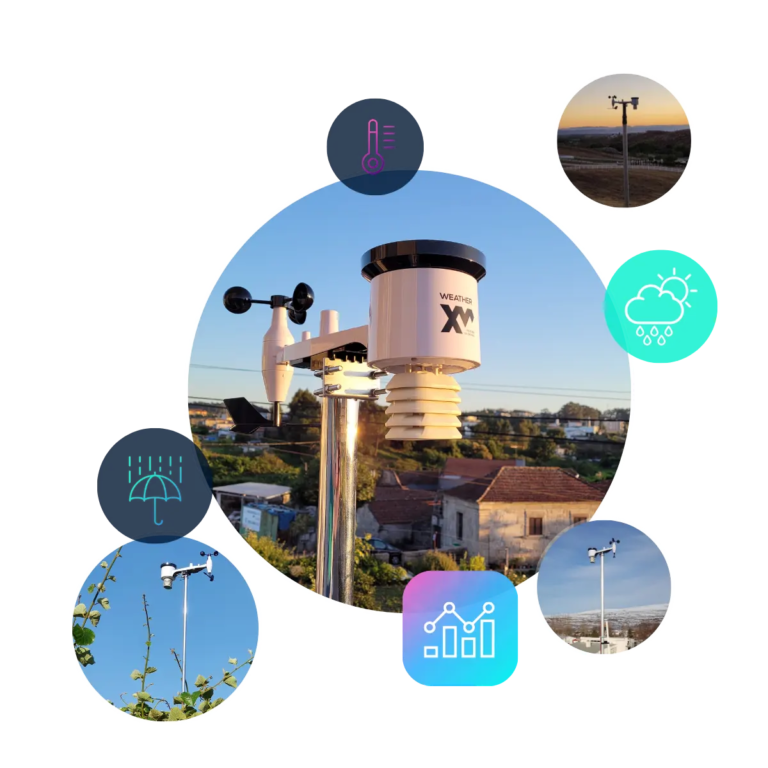
3. Build a Personal Weather Station
Building a personal weather station is a great project for those interested in meteorology and technology. Here’s a step-by-step guide to help you set up your own weather station
Plan Your Weather Station
Decide on the parameters you want to measure, such as temperature, humidity, wind speed, and atmospheric pressure. Determine if you want to include additional features like rainfall measurement or UV index. Sketch a rough design of the weather station, including the placement of sensors and the display or data logging system
Gather Components
Collect the necessary hardware for your weather station. Essential components include:
Microcontroller: Use a microcontroller such as an Arduino, Raspberry Pi, or a similar device. This will serve as the central unit to interface with the sensors, process the data collected, and manage the overall operation of your weather station.
Sensors: Equip your weather station with various sensors to capture different weather parameters. A temperature and humidity sensor like the DHT22 will provide data on atmospheric conditions. A wind speed sensor, such as an anemometer, measures wind velocity. A barometer is essential for recording atmospheric pressure. Optionally, you can include a rain gauge to measure precipitation and a UV sensor to monitor ultraviolet radiation levels.
Display: Choose a display method to present the weather data. You can use an LCD or LED screen for real-time data visualization. Alternatively, connect your weather station to a computer for data logging and more detailed analysis.
Enclosure: Protect your electronics with a weatherproof case. This enclosure safeguards the components from environmental conditions such as rain, dust, and extreme temperatures, ensuring the longevity and reliability of your weather station.
Power Supply: Decide on a power supply based on your location and requirements. Options include batteries for portable setups, a power adapter for consistent power from an outlet, or a solar panel for an eco-friendly and continuous power source.
With these components, you can assemble a weather station that accurately monitors and displays various weather conditions, providing valuable data for personal or research purposes.
Assemble and Connect Sensors
Connect the sensors to your microcontroller according to the sensor’s datasheet and wiring diagrams. Use jumper wires or a breadboard for prototyping. Ensure each sensor is correctly wired to the microcontroller’s input pins. For a more permanent setup, consider soldering connections to ensure durability
Write and Upload Code
Develop or obtain code for reading sensor data and processing it on your microcontroller. If using Arduino, you can find libraries and example code for common sensors online. Write the code to collect data from each sensor, process it, and display or log it. Upload the code to your microcontroller using the appropriate software (e.g., Arduino IDE for Arduino boards)
Setup Data Display or Logging
Decide how you want to display or log the data from your weather station. If using a display, write code to output real-time readings to the screen. If logging data, set up a system to store data on a local computer or cloud service. You can use software like Excel, Google Sheets, or specialized weather station software to analyze and visualize the data
Build and Encase
Place all electronics inside a weatherproof enclosure to protect them from rain, dust, and other environmental factors.
Ensure that sensors are mounted in a way that allows them to accurately measure environmental conditions. For outdoor sensors, mount them in locations where they will get accurate readings, such as away from heat sources and sheltered from direct rain
Test and Calibrate
Once assembled, test your weather station to ensure all sensors are working correctly and providing accurate readings. Compare your readings with a known accurate source if possible, and calibrate the sensors if necessary. Make adjustments to the code or sensor placement based on your testing
Maintain and Update
Regularly check and maintain your weather station to ensure it continues to function properly. Update the code or replace components as needed to improve performance or add new features. Your weather station will provide valuable insights into local weather conditions and can be a great tool for learning and experimentation

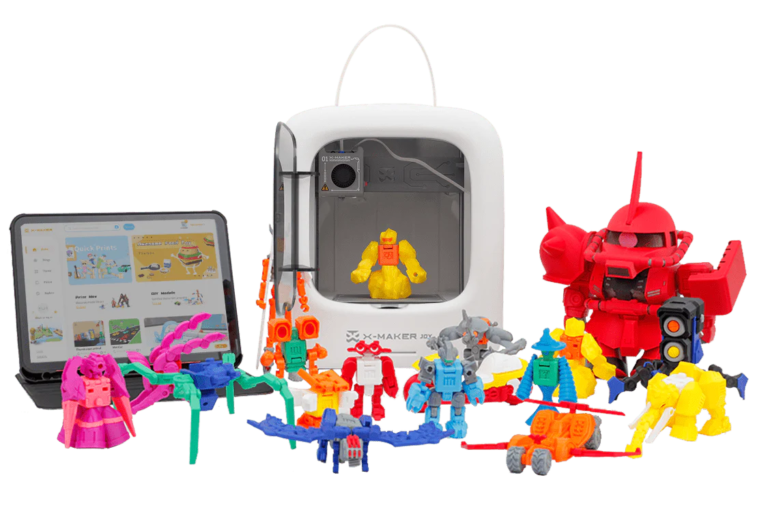
4. Design a Custom 3d Printed Gadget
Begin by deciding what type of gadget you want to design. Consider its functionality, size, and any specific features you need. Sketch out your ideas to visualize the gadget and determine its components and layout. This initial concept will guide your design process and ensure you stay focused on your objectives
Create a 3D Model
Use 3D modeling software such as Tinkercad, Fusion 360, or Blender to create a digital model of your gadget. Start by designing the basic shape and structure, then add details and features. Pay attention to dimensions and tolerances to ensure that all parts fit together properly. If you’re new to 3D modeling, start with simple designs and gradually work up to more complex ones
Prepare for Printing
Once your 3D model is complete, export it in a file format compatible with your 3D printer, such as STL or OBJ. Use slicing software like Cura or PrusaSlicer to convert your model into instructions for the 3D printer. Configure settings such as layer height, infill density, and support structures based on the material you’re using and the design’s requirements
Choose Materials
Select the appropriate material for your print. Common options include PLA for ease of use, ABS for strength and durability, or PETG for a balance between strength and flexibility. The choice of material will affect the gadget’s performance and finish, so choose one that matches the needs of your project
Print and Assemble
Load your sliced file into the 3D printer and start the printing process. Monitor the print to ensure everything is going smoothly and address any issues that arise. After printing, carefully remove the parts from the build plate and clean up any supports or imperfections. Assemble your gadget according to your design, ensuring that all parts fit together correctly and function as intended
Test and Refine
Test your 3D-printed gadget to ensure it works as expected. Check for any issues with functionality or fit, and make any necessary adjustments to your design. If needed, modify the 3D model and reprint parts to improve performance or address any problems. Iteration is key to refining your gadget and achieving the best result
Finalize and Use
Once you’re satisfied with the design and functionality, finalize your gadget. You can paint or finish the surface to enhance its appearance and durability. Your custom 3D-printed gadget is now ready for use, showcasing your design skills and creativity

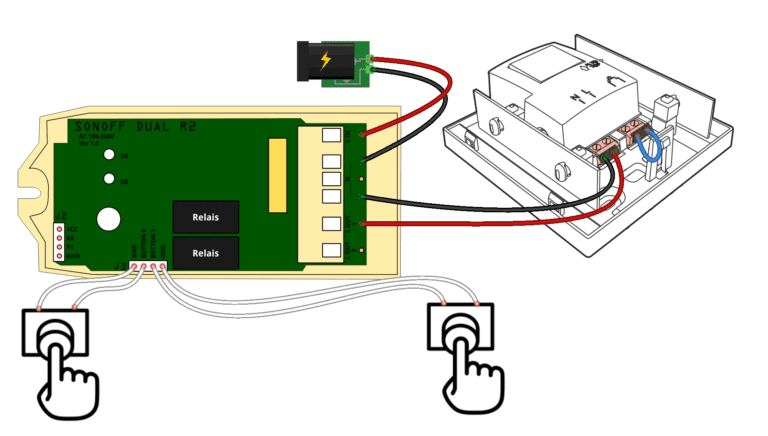
5. Build Your Own Smart DoorBell
Building a retro gaming console involves several steps. Here’s a detailed guide to help you through each part of the process
Gather Components
Begin by collecting all the necessary hardware. You will need a Raspberry Pi, which acts as the core of your console, a microSD card with at least 16GB of storage to hold the operating system and games, and a power supply to ensure the Raspberry Pi runs smoothly.
A case is essential for protecting the Raspberry Pi and aiding with cooling, and you should choose a USB or Bluetooth controller compatible with RetroPie.
Use an HDMI cable to connect your Raspberry Pi to your TV or monitor, and consider adding optional components like a cooling fan, heatsinks, and peripherals such as a keyboard or mouse for easier management
Install RetroPie
RetroPie is the software that turns your Raspberry Pi into a retro gaming console. Start by downloading the RetroPie image from the RetroPie website, ensuring you select the version that matches your Raspberry Pi model.
Use Balena Etcher or a similar tool to flash this image onto your microSD card, which prepares it for use with RetroPie. Insert the microSD card into your Raspberry Pi, connect it to your monitor with the HDMI cable, and ensure all other components are properly connected
Setup and Configuration
Once RetroPie is installed, you need to configure it.
Power on your Raspberry Pi, and RetroPie will boot up, prompting you to configure your controller.
Follow the on-screen instructions to set up your controller properly.
Connect to your Wi-Fi network through the RetroPie setup menu to enable network features and updates.
Ensure all software is up-to-date by running the update scripts available in the setup menu
Add Games
To add games, obtain ROMs legally and transfer them to your Raspberry Pi.
You can download ROMs from reputable sources or use a USB drive to copy files directly.
Place the ROM files into the appropriate game directories within the /home/pi/RetroPie/roms folder to organize your games
Customize Your Console
Customize your console by changing its appearance through themes and skins available in the RetroPie configuration menu. Install additional emulators if you want to play games from different consoles.
Configure save states and other features to enhance your gaming experience, adjusting settings to suit your preferences
Enjoy Your Retro Console
With everything set up and customized, navigate through the RetroPie interface to start playing your classic games.
Regularly update your software and manage your game library to keep your console running smoothly and ensure an enjoyable gaming experience


1 comment