How to Build a Professional WordPress Website: A Step-by-Step Guide
Creating a website with WordPress is a highly rewarding endeavor, offering a flexible and user-friendly platform suitable for a variety of purposes, including blogging, e-commerce, and professional portfolios.
WordPress powers over 40% of the web, making it a popular choice for building and managing websites. This comprehensive guide is designed to walk you through each step of the process, from selecting your domain name to the final launch of your site.
Whether you are a complete beginner or have some experience with web development, this guide will help you navigate the complexities of creating a WordPress site.
We’ll cover everything from choosing the right hosting provider to customizing your site’s appearance and functionality. By the end of this guide, you’ll have the knowledge and tools needed to build a fully functional and visually appealing website that meets your needs.
1. Choosing a Domain and Hosting
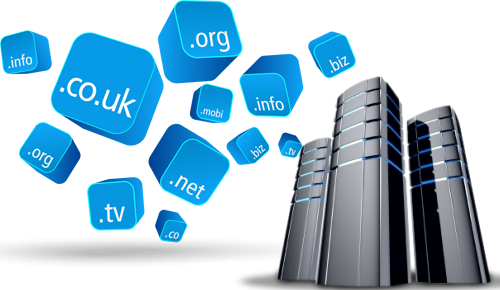
Choosing a domain name and hosting provider is a foundational step in building a successful WordPress site.
The domain name is your website’s address on the internet, and it’s essential to choose one that reflects your site’s purpose and is easy for users to remember. Ideally, your domain should be short, simple, and relevant to your content.
For example, if you’re launching a blog about eco-friendly living, a domain like EcoLifeTips.com might be appropriate. Avoid complex spellings or hyphens, which can confuse potential visitors.
Selecting the right hosting provider is equally important, as it affects your site’s performance, security, and scalability. There are several types of hosting to consider:
Shared Hosting: Ideal for beginners or small sites with low traffic. It is cost-effective but comes with limitations on resources and performance, as you share server space with other websites.
VPS Hosting: A step up from shared hosting, VPS (Virtual Private Server) offers more control and resources. It’s suitable for growing sites that need more flexibility and power without the expense of a dedicated server.
Dedicated Hosting: Provides an entire server for your site, offering the best performance and security. This option is generally for high-traffic websites or those with specialized requirements.
Managed WordPress Hosting: Specifically tailored for WordPress sites, this type of hosting handles technical aspects like updates, backups, and security. It is often more expensive but provides a hassle-free experience with expert support.
When choosing a hosting provider, consider factors such as uptime guarantees, customer support, security features (like SSL certificates and firewalls), and scalability to handle future growth. Look for reviews and compare different options to find the best fit for your needs.
Your domain name and hosting choice lay the groundwork for your website’s success, impacting everything from site speed and security to your site’s overall user experience. By making informed decisions in these areas, you ensure a solid foundation for your WordPress site’s performance and growth.
2. Installing WordPress
After installing WordPress, you’ll start by configuring the basic settings through the WordPress dashboard.
First, navigate to Settings > General. Here, you can adjust key details about your site. Set your Site Title and Tagline to reflect your brand and what your site offers. The Site Title is typically the name of your website, while the Tagline is a short description or slogan.
Next, you need to configure WordPress Address (URL) and Site Address (URL). In most cases, these will be the same, but they can differ if you’re running WordPress in a subdirectory.
Adjust the time zone to your local time to ensure that your posts and activities are logged correctly. Additionally, set your preferred date and time format to match your region’s conventions.
Moving on to Settings > Writing, you can set the default post category and post format. If you plan to use email to publish posts, you can configure these settings here as well.
In Settings > Reading, choose what your homepage displays. You can set it to show your latest posts or a static page. If you opt for a static page, select the specific pages for your homepage and posts page. This is where you define the content that visitors see when they land on your site.
Settings > Discussion allows you to manage comment settings. Decide if you want to allow comments on posts and pages and configure settings for comment moderation and notifications.
Lastly, in Settings > Media, set the default image sizes for your media uploads. This helps maintain a consistent look and feel for images across your site.
By carefully configuring these settings, you lay a solid foundation for your WordPress site, enhancing its usability and ensuring it meets your content and user management needs.

3. Configuring Basic Settings
Configuring Basic Settings in WordPress is essential for tailoring your website to meet your specific needs and preferences. Once WordPress is installed, access the basic settings by navigating to the WordPress dashboard and selecting Settings from the menu.
Begin with General Settings where you can set your Site Title and Tagline. The Site Title should reflect the name of your website or business, while the Tagline provides a brief description of what your site offers. Ensure these are both clear and engaging to attract visitors.
Next, adjust the WordPress Address (URL) and Site Address (URL) fields. These should generally match, but in cases where WordPress is installed in a subdirectory, they will differ. Verify these URLs are correct to prevent access issues.
Set your Timezone according to your local time zone. This ensures that timestamps for posts, comments, and activities are accurate. Additionally, choose your Date Format and Time Format to align with regional preferences or personal preferences for displaying dates and times on your site.
In the Writing Settings, you can configure the default post category and post format. This setup is useful for organizing your content and ensuring consistency in how posts are categorized and formatted. You can also enable or disable the option to post via email if needed.
For Reading Settings, decide what content should appear on your homepage. You can choose to display your latest posts or a static page. If you select a static page, designate which page should serve as your homepage and which should be used for blog posts.
In the Discussion Settings, manage comment settings to control whether comments are allowed on posts and pages. Set up options for comment moderation and notifications to manage interactions with your audience effectively.
Finally, adjust the Media Settings to define default image sizes for your uploads. This ensures that media files are appropriately sized and optimized for your site’s layout.
Properly configuring these settings will help ensure that your WordPress site functions smoothly and meets your content management needs effectively.
4. Choosing and Installing a Theme
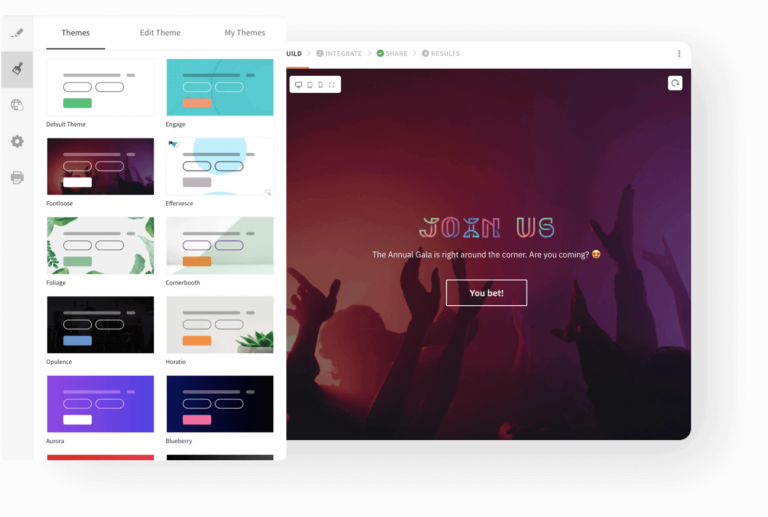
Choosing and Installing a Theme is a critical step in establishing the visual identity and functionality of your WordPress website.
Begin by selecting a theme that aligns with your site’s purpose and aesthetic preferences. To do this, navigate to the Appearance section in your WordPress dashboard and click on Themes. You can browse through the available themes in the WordPress repository or upload a custom theme.
When choosing a theme, consider factors such as design flexibility, responsiveness (how well the theme adapts to different devices), and compatibility with plugins. Look for themes that offer customization options, allowing you to adjust colors, fonts, and layouts without needing to code.
Reading user reviews and checking the theme’s update history can also provide insights into its reliability and support.
Once you’ve selected a theme, click the Add New button and either search for your chosen theme or upload a ZIP file if it’s a custom theme. Click Install and then Activate to apply the theme to your site.
After activation, you can customize the theme further by selecting Customize under the Appearance menu. This will open the WordPress Customizer, where you can adjust settings such as your site’s logo, colors, and menu structure in real-time.
Installing a theme effectively sets the foundation for your site’s design, ensuring it not only looks appealing but also functions smoothly. Regularly updating your theme and reviewing its performance will help maintain both security and compatibility as your site evolves.

5. Installing Essential Plugins
Installing Plugins: Plugins extend the functionality of your WordPress site. Go to Plugins > Add New to search for and install plugins. Essential plugins for most sites include SEO tools (e.g., Yoast SEO), security plugins (e.g., Wordfence), and performance enhancers (e.g., W3 Total Cache). Install and activate plugins based on your site’s needs.
Configuring Plugins: After installing plugins, configure their settings to optimize their performance and functionality. Each plugin typically has its own settings page, accessible through the WordPress dashboard. Follow the plugin’s documentation or guidelines for proper setup and usage.

6. Creating Content
Adding Pages: Pages are static content that forms the core structure of your site, such as Home, About, and Contact. Go to Pages > Add New to create and publish pages. Use the WordPress editor to add text, images, and other media to your pages.
Creating Posts: Posts are dynamic content that appears in reverse chronological order on your blog or news section. Navigate to Posts > Add New to write and publish posts. Organize your posts using categories and tags to help users find related content.
Adding Menus: Menus help users navigate your site. Go to Appearance > Menus to create and manage navigation menus. Add your pages, posts, or custom links to the menu and arrange them in a logical order. Assign the menu to a location on your site, such as the header or footer.
7. Maintaining Your Site
Keeping Software Updated: Regularly update WordPress, themes, and plugins to ensure your site remains secure and functional. Check for updates in your dashboard and apply them promptly.
Backing Up Your Site: Implement a backup solution to regularly back up your site’s content and database. Use plugins or hosting features that offer automated backup options to protect your data.
By following this step-by-step guide, you’ll be well on your way to creating a professional and functional WordPress website. Enjoy the process of building and managing your online presence, and make sure to keep your site updated and optimized for the best results.
Routine backups are also important, allowing you to restore your site quickly in case of data loss or technical issues. Additionally, monitoring site performance through tools and plugins helps identify and resolve issues like slow loading times or broken links.
Keeping your content fresh and relevant, engaging with your audience, and analyzing traffic and user behavior through analytics tools will help you make informed decisions to enhance your site’s effectiveness.
Regular maintenance not only helps prevent problems but also ensures that your site remains functional, secure, and optimized for a positive user experience.


Post Comment